概要
Zabbix5.0 Serverをインストール手順です。
ZABBIX5公式サイト
下記が公式ドキュメントのインストール手順です。基本的には下記の手順に従ってインストールしています。
ZABBIX5公式ドキュメント RedHat/CentOS インストール
インストール環境
- CentOS 8.1
- SELinuxは無効 SELinux設定変更手順
- firewalldは無効 firewalld設定変更手順
Apache / PHP 7.3 インストール
|
1 2 3 4 |
dnf -y install httpd dnf -y module reset php dnf -y module enable php:7.3 dnf -y install php php-mysqlnd php-gd php-xml php-bcmath php-ldap php-mbstring php-ldap |
phpのtimzezoneを日本時間に変更
/etc/php/ini の 922行の date.timezone をコメントアウトして date.timezone = Asia/Tokyo に変更する。
|
1 2 3 4 5 6 7 8 9 10 11 12 |
[root@zabbix5 ~]# cd /etc/ [root@zabbix5 etc]# cp php.ini php.ini.org [root@zabbix5 etc]# vi php.ini [Date] ; Defines the default timezone used by the date functions ; http://php.net/date.timezone ;date.timezone = date.timezone = Asia/Tokyo [root@zabbix5 etc]# diff php.ini php.ini.org 923d922 < date.timezone = Asia/Tokyo [root@zabbix5 etc]# |
MariaDB 10.3のインストール初期設定
-
MariaDBのインストール
1dnf module -y install mariadb:10.3 -
MariaDBの起動および自動起動設定
1systemctl enable --now mariadb - MariadBの管理者パスワード設定および不要なユーザおよびDB削除
※下記では DBの管理者パスワードを DBrootPassowrd を設定しています。
123456789101112131415161718192021222324252627282930313233343536373839404142434445464748495051525354555657585960616263[root@zabbix5 ~]# mysql_secure_installationNOTE: RUNNING ALL PARTS OF THIS SCRIPT IS RECOMMENDED FOR ALL MariaDBSERVERS IN PRODUCTION USE! PLEASE READ EACH STEP CAREFULLY!In order to log into MariaDB to secure it, we'll need the currentpassword for the root user. If you've just installed MariaDB, andyou haven't set the root password yet, the password will be blank,so you should just press enter here.## 下記は何も入力せずエンターを押下Enter current password for root (enter for none):OK, successfully used password, moving on...Setting the root password ensures that nobody can log into the MariaDBroot user without the proper authorisation.Set root password? [Y/n] y## 下記にDB管理者用パスワードを入力New password: DBrootPassword(実際には表示されません)Re-enter new password: DBrootPassword(実際には表示されません)Password updated successfully!Reloading privilege tables..... Success!By default, a MariaDB installation has an anonymous user, allowing anyoneto log into MariaDB without having to have a user account created forthem. This is intended only for testing, and to make the installationgo a bit smoother. You should remove them before moving into aproduction environment.Remove anonymous users? [Y/n] y... Success!Normally, root should only be allowed to connect from 'localhost'. Thisensures that someone cannot guess at the root password from the network.Disallow root login remotely? [Y/n] y... Success!By default, MariaDB comes with a database named 'test' that anyone canaccess. This is also intended only for testing, and should be removedbefore moving into a production environment.Remove test database and access to it? [Y/n] y- Dropping test database...... Success!- Removing privileges on test database...... Success!Reloading the privilege tables will ensure that all changes made so farwill take effect immediately.Reload privilege tables now? [Y/n] y... Success!Cleaning up...All done! If you've completed all of the above steps, your MariaDBinstallation should now be secure.Thanks for using MariaDB![root@zabbix5 ~]#
ZABBIX-Serverのインストール
- Zabbix repositoryのインストール
12rpm -Uvh https://repo.zabbix.com/zabbix/5.0/rhel/8/x86_64/zabbix-release-5.0-1.el8.noarch.rpmdnf clean all - Zabbix Server フロントエンドおよびAgentのインストール
1dnf -y install zabbix-server-mysql zabbix-web-mysql zabbix-apache-conf zabbix-agent zabbix-web-japanese - Zabbix用DB作成およびパスワード設定
※Zabbix用のパスワードは ZabbixDBPassowrd としています。
12345mysql -uroot -ppassword (DB管理者パスワードを入力)create database zabbix character set utf8 collate utf8_bin;grant all privileges on zabbix.* to zabbix@localhost identified by 'ZabbixDBPassword';quit; - Zabbix用DB初期設定
※パスワードの問い合わせがあるので 上記で設定した Zabbix用DBのパスワードを入力します。
1zcat /usr/share/doc/zabbix-server-mysql*/create.sql.gz | mysql -uzabbix -p zabbix - ZabbixServerのDB設定
/etc/zabbix/zabbix_server.conf の124行目をコメントアウトしてZabbixDBのパスワードを設定します。
※上記で設定したパスワードを入力して下さい。
12345678910111213141516[root@zabbix5 ~]# cd /etc/zabbix/[root@zabbix5 zabbix]# cp zabbix_server.conf zabbix_server.conf.org[root@zabbix5 zabbix]# vi zabbix_server.conf### Option: DBPassword# Database password.# Comment this line if no password is used.## Mandatory: no# Default:DBPassword=ZabbixDBPassword[root@zabbix5 zabbix]# diff zabbix_server.conf zabbix_server.conf.org124c124< DBPassword=ZabbixDBPassword---> # DBPassword=[root@zabbix5 zabbix]# - phpのtimezonaを設定
/etc/php-fpm.d/zabbix.conf の24行目をコメントアウトして Asia/Tokyo に変更します。
12345678910111213[root@zabbix5 zabbix]# cd /etc/php-fpm.d[root@zabbix5 php-fpm.d]# cp zabbix.conf zabbix.conf.org[root@zabbix5 php-fpm.d]# vi zabbix.confphp_value[upload_max_filesize] = 2Mphp_value[max_input_time] = 300php_value[max_input_vars] = 10000php_value[date.timezone] = Asia/Tokyo[root@zabbix5 php-fpm.d]# diff zabbix.conf zabbix.conf.org24c24< php_value[date.timezone] = Asia/Tokyo---> ; php_value[date.timezone] = Europe/Riga[root@zabbix5 php-fpm.d]# - Zabbix Serverおよびagentの起動および自動起動設定
12systemctl restart zabbix-server zabbix-agent httpd php-fpmsystemctl enable zabbix-server zabbix-agent httpd php-fpm
スポンサーリンク
Zabbixのフロンドエンドの設定
- ブラウザで http://サーバーのIPアドレス/zabbix で接続します。
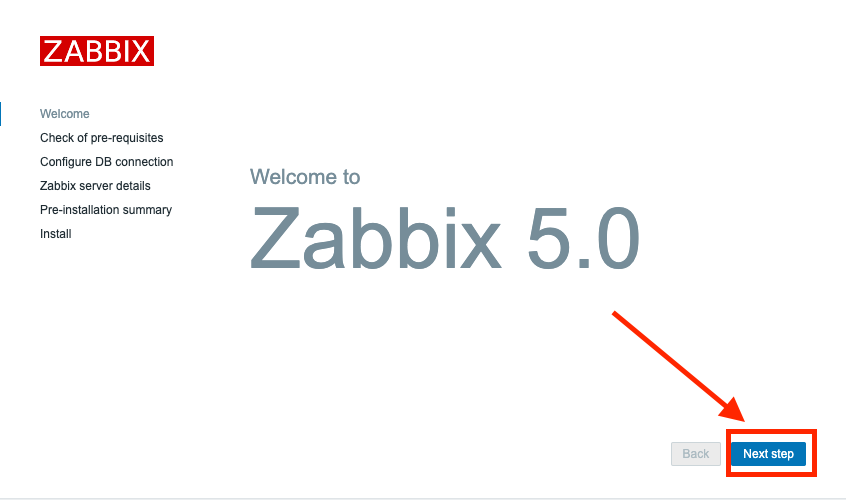
- 下記画面が表示されたら、 「Next step」をクリックします。
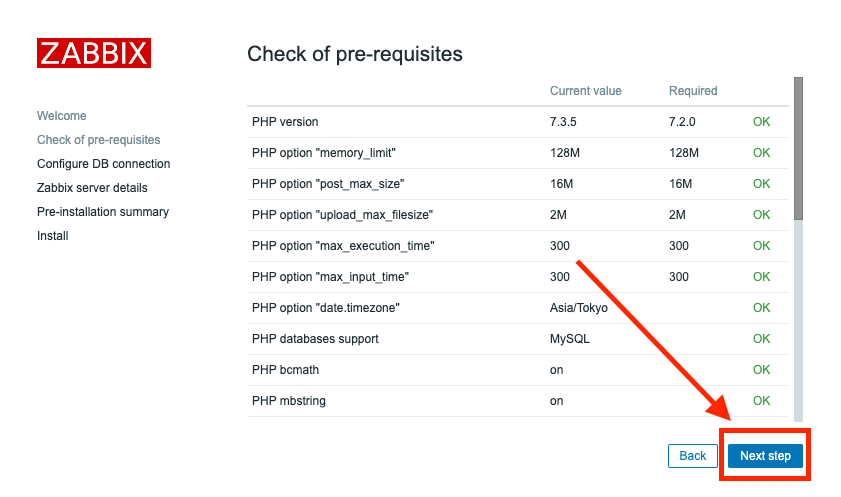
- 下記画面が表示されたら、 「Next step」をクリックします。
- PasswordはZabbixのDBパスワードを入力します。※今回の例ではZabbixDBPasswordを入力

- 特に変更する必要ありませんが、Zabbixサーバーのホスト名などを修正が必要な場合は変更してください。「Next step」をクリックする。
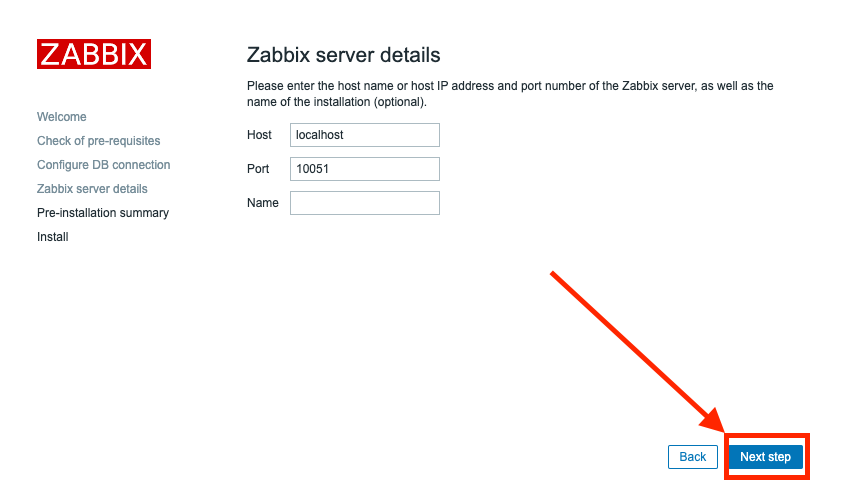
- インストール前の設定確認になります。設定に問題なければ、「Next Step」をクリックて下さい。
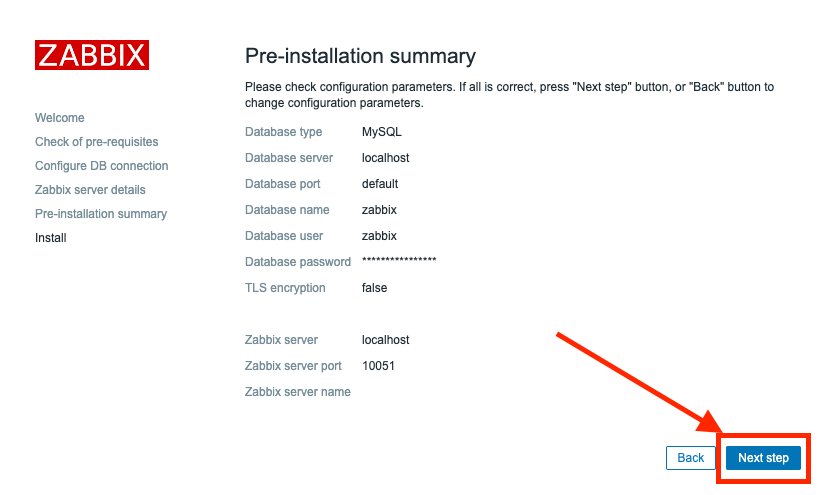
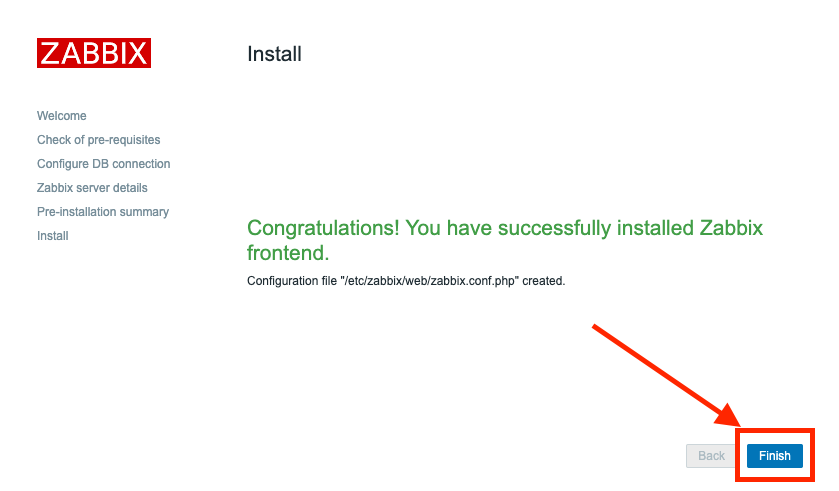
- ZabbixServerのインストールの完了です。 「Finish」をクリックして下さい。
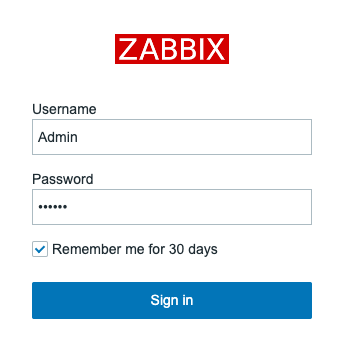
- 初期のアカウントは Admin パスワードは zabbix を入力して 「Sign in」 をクリックします。
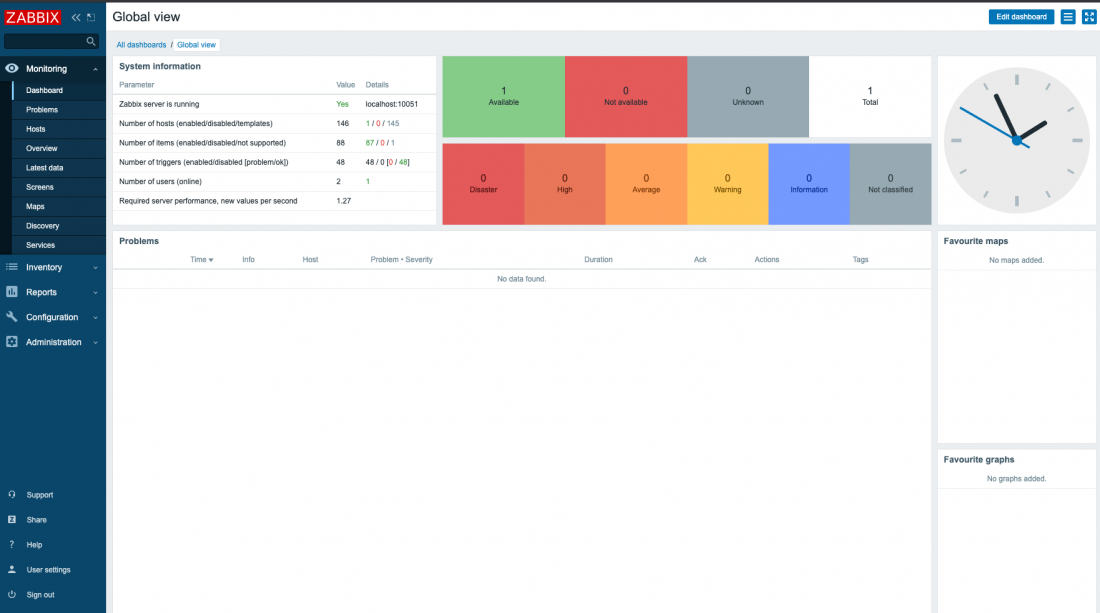
- 下記画面が表示されたらインストール完了です。
Zabbix日本語化設定
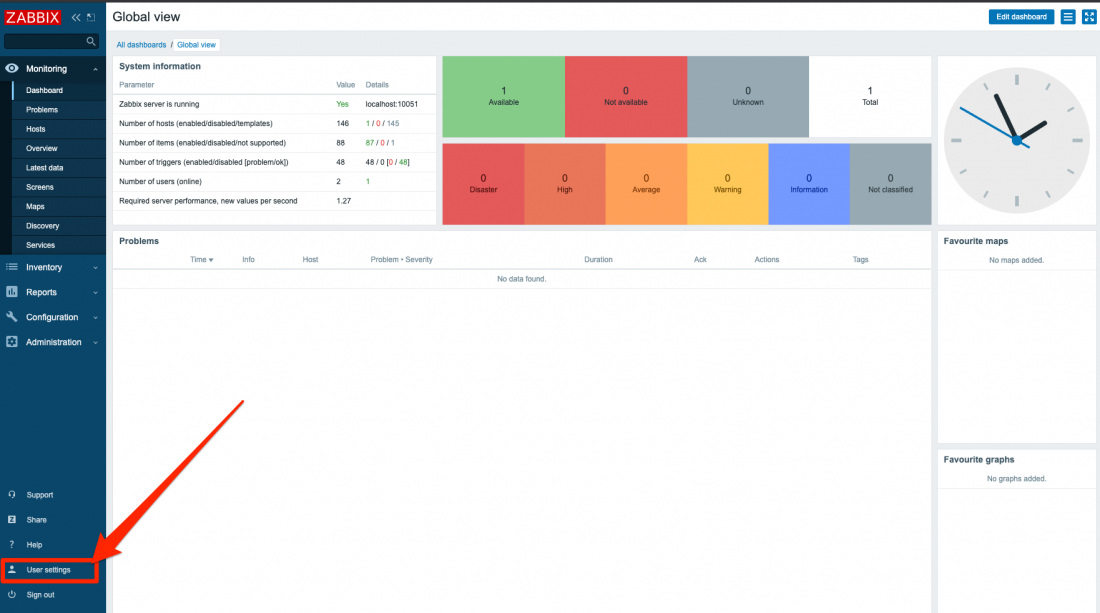
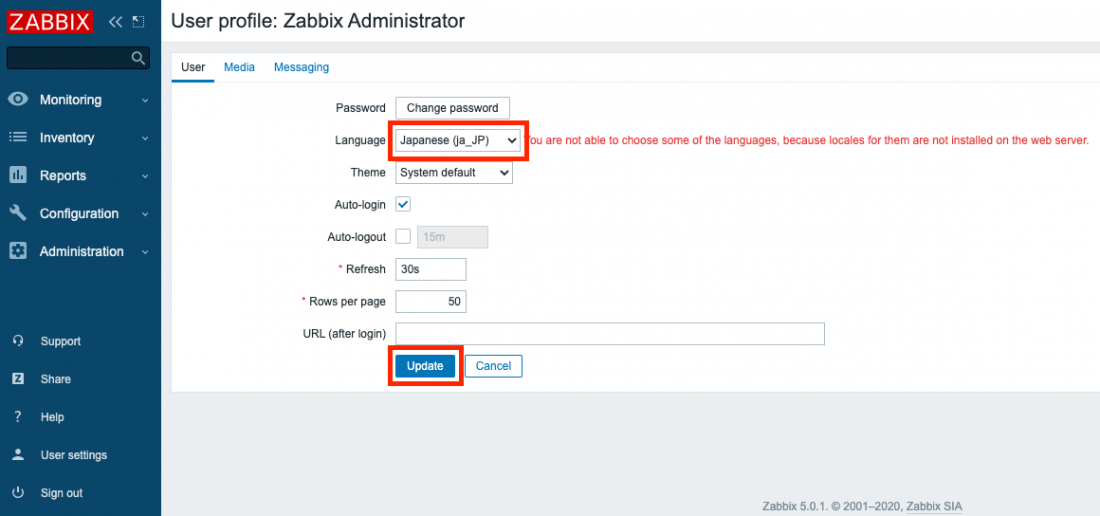
- ZabbixServerにログインして、左下の「User settings」をクリックします。
- Languageを「Japanese (ja_JP)」に変更して「Update」をリックします。
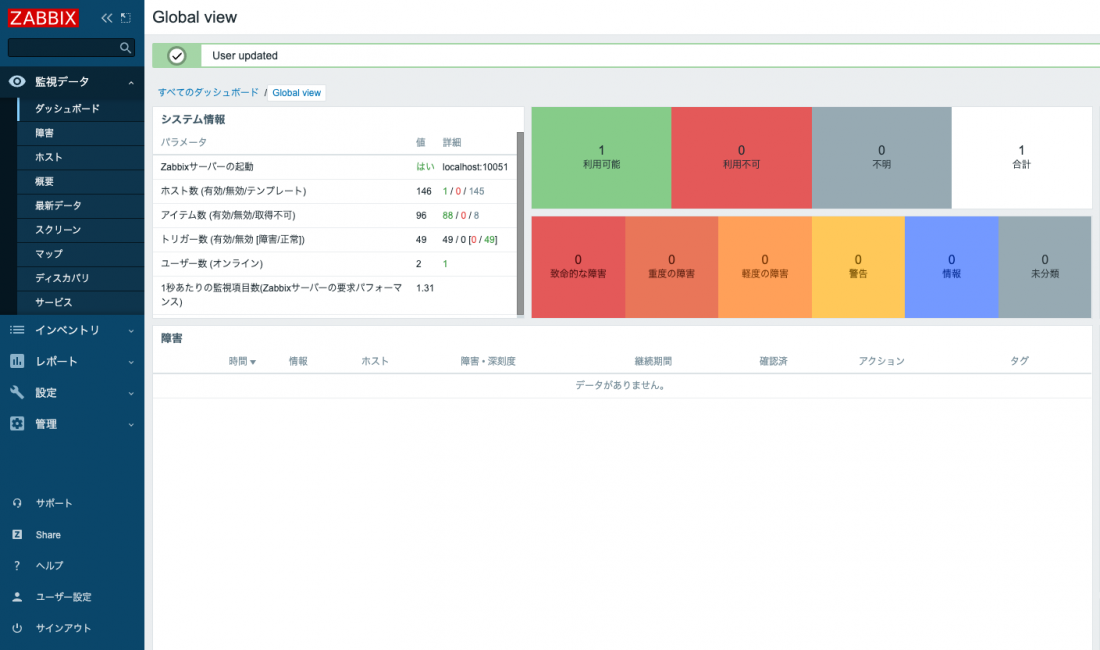
- Webの表示が日本語に変更されました。
以上。Zabbix5.0 Server インストール手順書でした。
CentOS8にagentをインストールして監視ホストを追加する手順は下記をどうぞ。

Zabbix 5.0 agent を CentOS8 にインストールして監視設定の追加手順
CentOS8 その他設定方法は下記ページからどうぞ

CentOS8 設定方法